Movement Design
Storyboard 
Once it's clear what modification is needed on the terrain, it's necessary to define changes in the topography. To do this, you must specify the boundaries of the area where the earthmoving will take place and their corresponding elevations.
It's important to consider:
Earthmoving should include estimating the volumes to be removed and the volumes to be added to ensure you have the necessary quantities.
Having reference lines for earthmoving is crucial. These lines can be established using markers or imaginary lines with easily distinguishable references.
ID:(72, 0)
Definition of earthworks
Description 
On the western side, there is a hill that gradually slopes down and has a normal gradient. Additionally, it is situated at a high point, offering an excellent view of the entire coastline. Therefore, it makes sense to create a balcony overlooking the sea along a contour line (as suggested by Ingrid, my sister):
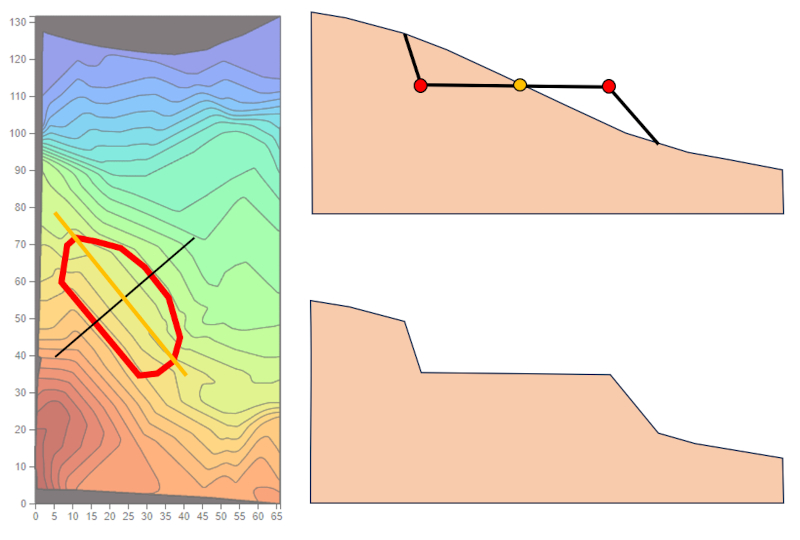
To implement this, it is necessary to locate the yellow line and the two parallel lines that mark the boundaries of the excavation and the embankment on the terrain.
ID:(544, 0)
Definition of access
Description 
Once the location of the house has been determined, it is important to design the access. In most cases, the street access is already defined. However, in the case of Palos Verdes, there was no clear access established beforehand. What we had was what we could call a logical access, as it was the closest to the street. However, at first glance, it didn't seem to be the most practical option, as it involved descending about 10 meters from the street to the plateau. For this reason, we considered the possibility of obtaining legal access through the neighbors to use the private service road (option a). This way, we could achieve a more gradual descent, even without as many curves. At the very least, this approach would reduce the number of curves that a direct access from the street would have. If this were not feasible, for example, if the neighbors were unwilling to cooperate or the conditions they would impose were unacceptable, we would have to opt for direct access from the highway, as shown in option (b). However, the equipment operator, Andrés Naguil, proposed an alternative: to use what remained of the old road and enter through the center of the parcel, performing the first part of the descent on an external route (option c):
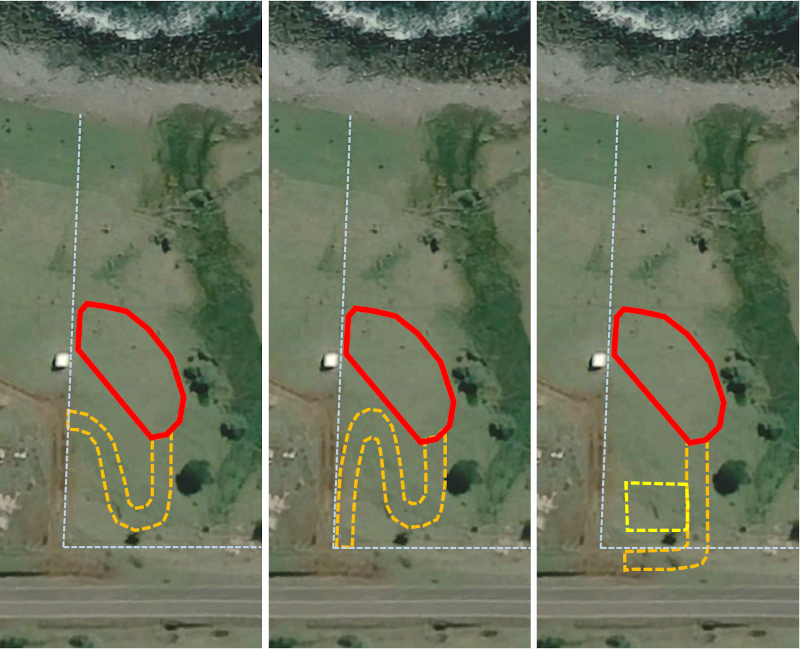
(a) Access via a private road, (b) Direct access from the highway, (c) Access by shifting the entry point (google map).
The main advantage of this third solution is that it would not require negotiating access with the neighbors, and we would not lose a significant portion of the land to a road with multiple curves. Additionally, it would eliminate the need for creating a tight curve and moving earth internally to create a ramp.
By studying Google Earth, we were able to confirm that in 2004, the trace of the old road was still visible, next to which the new road was constructed:
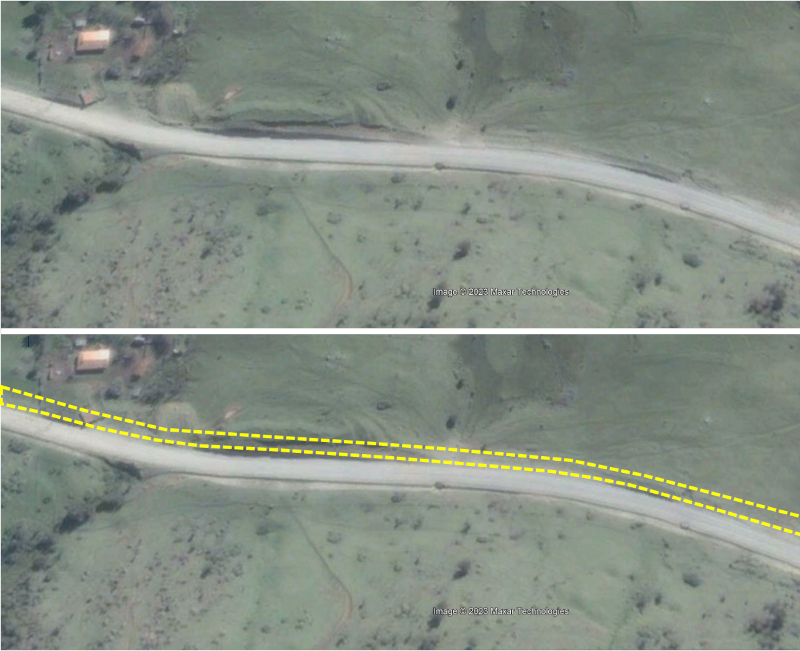
The original road still visible in 2004 (google earth).
If we observe the current situation, we can clearly see how this area corresponds to the current fiscal strip, which has become more defined over time due to constructions along its edge. Furthermore, we can see how other neighbors have also taken advantage of this strip to facilitate their access. In the case of the neighbor to the southeast, they faced the same dilemma: whether to build access from the point closest to the highway or to use the fiscal strip to reach a lower point and develop an embankment in the place where the access originally would have been:
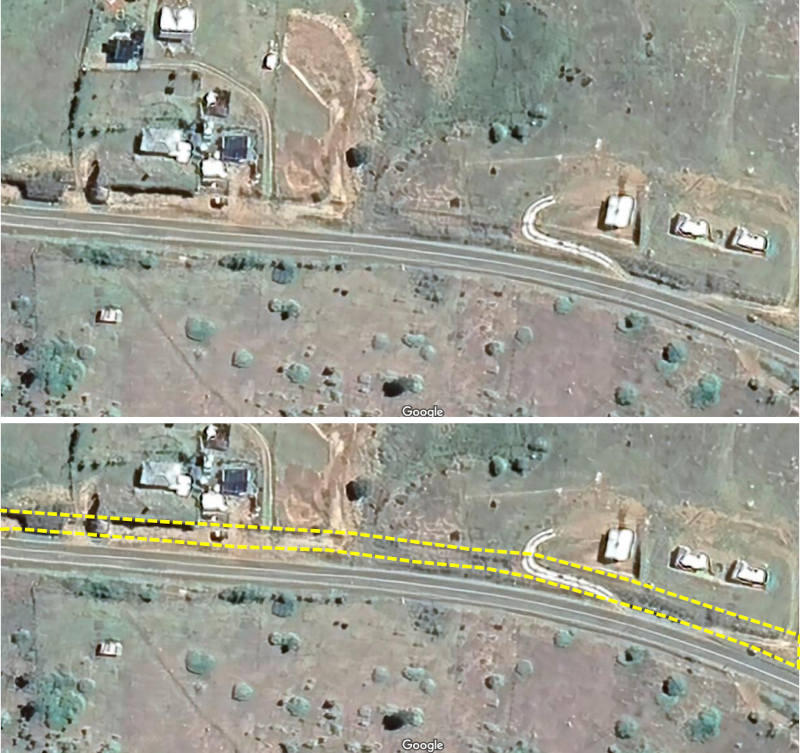
Visibility of the fiscal strip and access through it (google map).
"
ID:(668, 0)
Upload data to the app
Description 
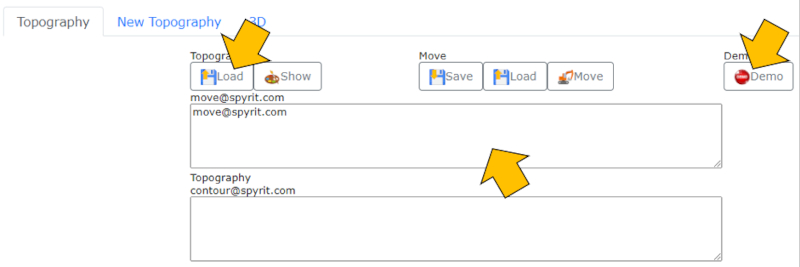
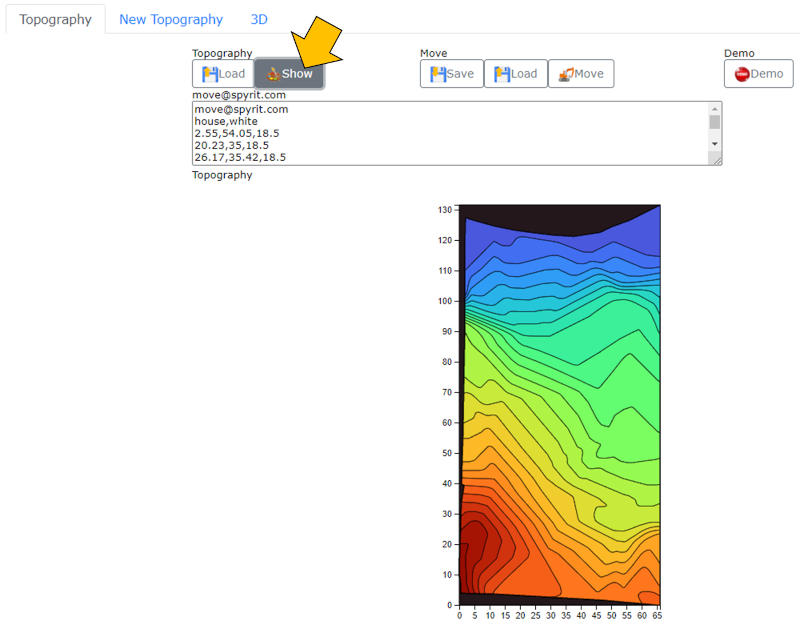
The first step is to load the topographical data into the earthmoving application. This can be done by entering the data manually, uploading a file, or using the Palos Verdes data for study purposes through the Demo button:
Once the data is loaded, you can display it by clicking on the Show button:
ID:(546, 0)
Esplanade definition
Description 
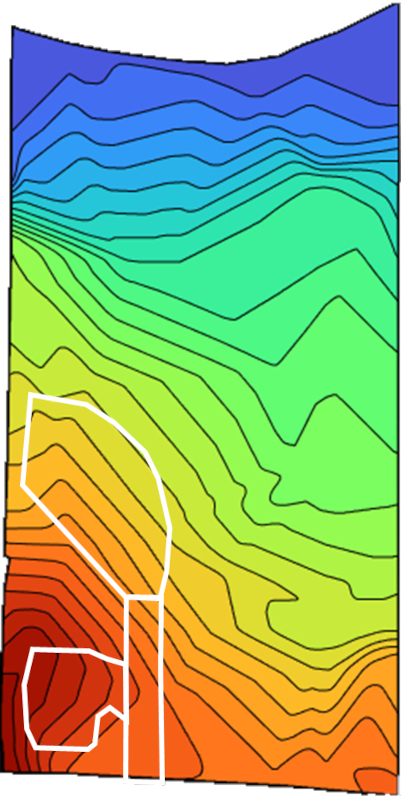
With a topographic plan, we can begin to define the areas where earth will be moved. In this case, earth will be redistributed at the level of creating the esplanade, meaning it will be moved from an upper area to fill in the lower area.
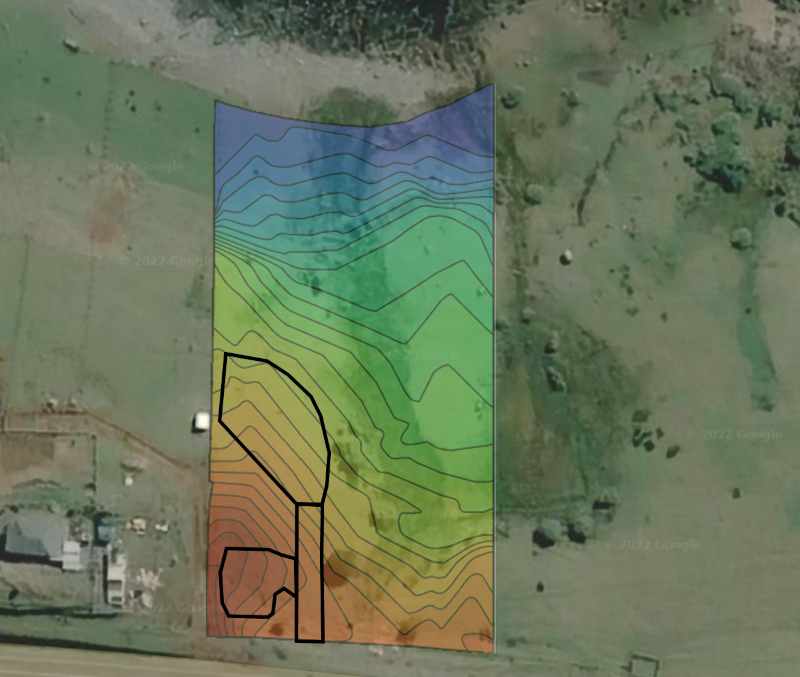
To create the access, it's necessary to fill the entrance area, for which earth must be extracted from a space on the southwest edge (bottom left). The volume of this area should supply the necessary earth.
The plan can then be overlaid on the Google map to start identifying reference points.
"
ID:(549, 0)
Entering the coordinates of the intervention
Description 
To define the earthwork, a grid is created in which the first line of each record indicates the position and distances, and the second line specifies the elevation to be achieved, with a zero if no modification is required:
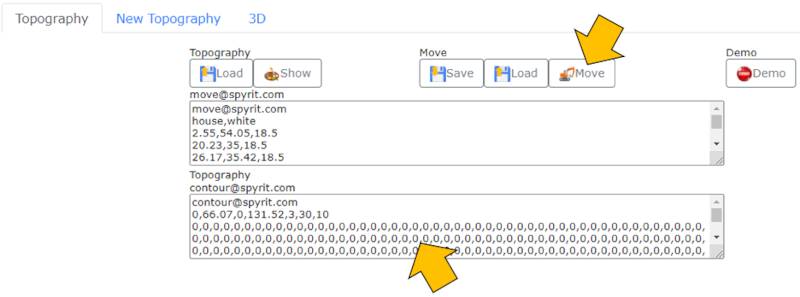
When you press the "Movement" button, the new topography with the modifications is displayed:
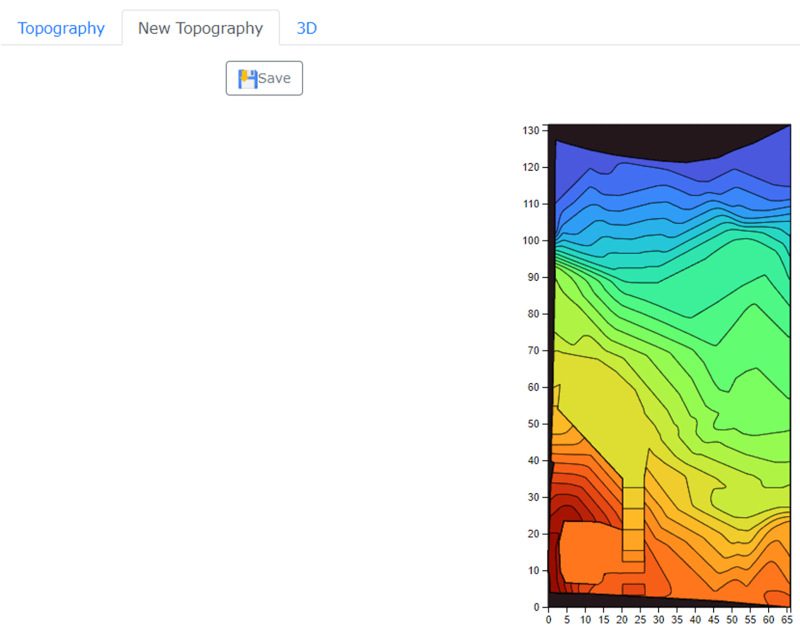
ID:(550, 0)
Defining field marks
Description 
Moving earth can be a challenging task, especially when marking the terrain, as the marks may be affected by the work itself. In this case, the approach involved defining border lines and working with a guide who provided guidance through observation.
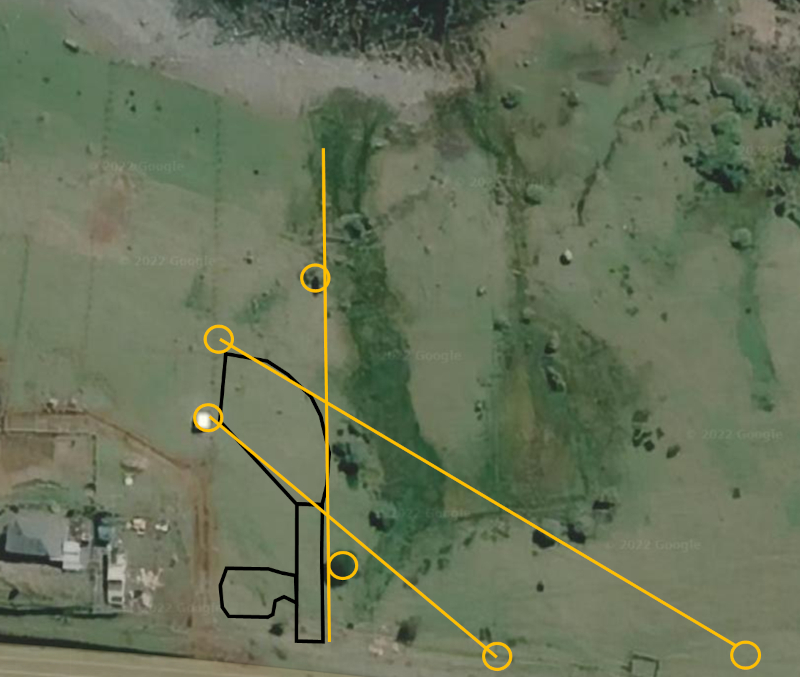
There are three baseline reference lines in this case:
• From tree to tree
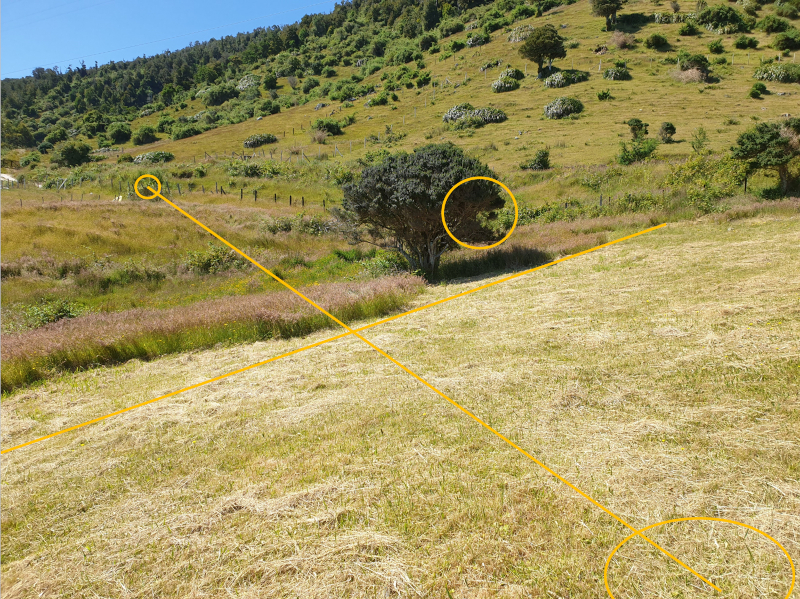
• From the neighbor's shed to the corner of the parcel
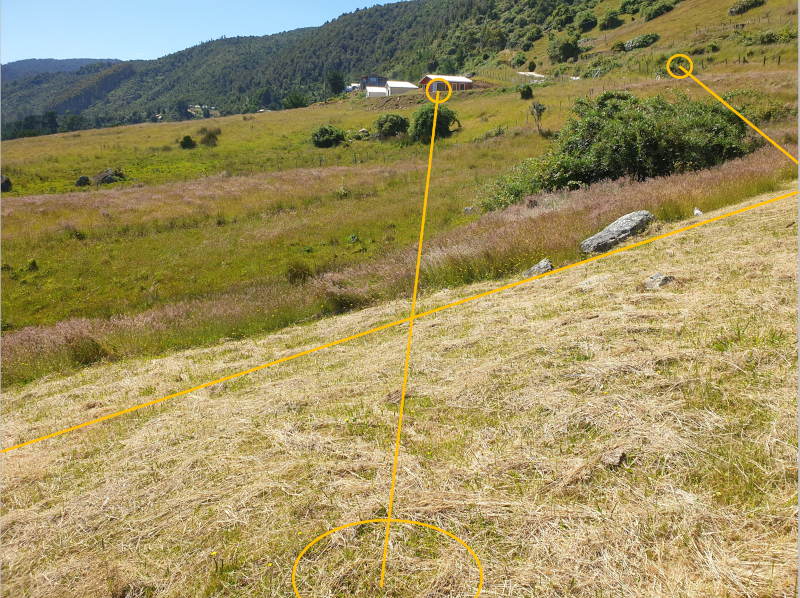
• From the rock near the neighbor to the new cabin in the other neighborhood
All these points are easily visible and can be used as reliable references without being obscured.
ID:(551, 0)
Line of trees
Description 
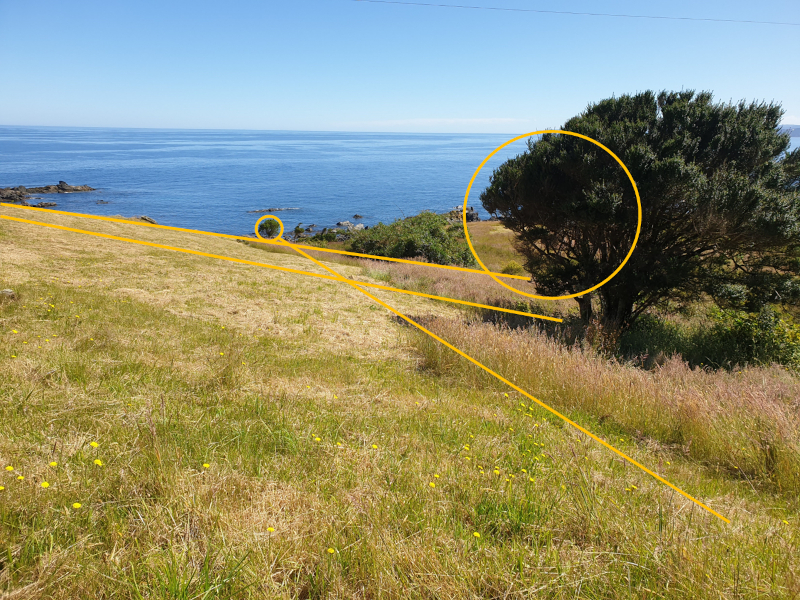
The line between the trees can be monitored either from the entrance to the land or from the base of the lower wetland.
ID:(552, 0)
Esplanade border line
Description 
The second line defines the edge of the esplanade. At one end, it is associated with a rock in the area of the western fence and the cabin that the neighbor is building:
ID:(553, 0)
Esplanade wall border line
Description 
The third line goes from the neighbor's cellar (corner) to the southeast corner of the plot:
ID:(554, 0)
